Battle of Timor
| ||||||||||||||||||||||||||||||||||
The Battle of Timor occurred in Portuguese Timor and Dutch Timor during the Second World War. Japanese forces invaded the island on 20 February 1942 and were resisted by a small, under-equipped force of Allied military personnel—known as Sparrow Force—predominantly from Australia, United Kingdom, and the Netherlands East Indies. Following a brief but stout resistance, the Japanese succeeded in forcing the surrender of the bulk of the Allied force after three days of fighting, although several hundred Australian commandos continued to wage an unconventional raiding campaign. They were resupplied by aircraft and vessels, based mostly in Darwin, Australia, about 650 km (400 mi) to the southeast, across the Timor Sea. During the subsequent fighting the Japanese suffered heavy casualties, but they were eventually able to contain the Australians.
The campaign lasted until 10 February 1943, when the final remaining Australians were evacuated, making them the last Allied land forces to leave South East Asia following the Japanese offensives of 1941–42. As a result, an entire Japanese division was tied up on Timor for more than six months, preventing its deployment elsewhere. Although Portugal was not a combatant, many East Timorese civilians and Portuguese European colonists fought with the Allies, or provided them with food, shelter and other assistance. Some Timorese continued a resistance campaign following the Australian withdrawal. For this, they paid a heavy price and tens of thousands of Timorese civilians died as a result of the Japanese occupation, which lasted until the end of the war in 1945.
Part of a series on the |
|---|
| History of East Timor |
 |
| Chronology |
| Topics |
|
|
Background
By late-1941, the island of Timor was divided politically between two colonial powers: the Portuguese in the east with a capital at Dili, and the Dutch in the west with an administrative centre at Kupang. A Portuguese enclave at Ocussi was also within the Dutch area.[2] The Dutch defence included a force of 500 troops centred on Kupang, while the Portuguese force at Dili numbered just 150.[3] In February, the Australian and Dutch governments had agreed that in the event Japan entered the Second World War on the Axis side, Australia would provide aircraft and troops to reinforce Dutch Timor. Portugal—under pressure from Japan—maintained its neutrality.[1][4][5] As such, following the Japanese attack on Pearl Harbor, a small Australian force—known as Sparrow Force—arrived at Kupang on 12 December 1941.[4] Meanwhile, two similar forces, known as Gull Force and Lark Force, were sent by the Australians to reinforce Ambon and Rabaul.[6]
Sparrow Force was initially commanded by Lieutenant Colonel William Leggatt, and included the 2/40th Battalion, a commando unit—the 2nd Independent Company—under Major Alexander Spence, and a battery of coastal artillery. There were in total around 1,400 men.[2][5] The force reinforced Royal Netherlands East Indies Army troops under the command of Lieutenant Colonel Nico van Straten, including the Timor and Dependencies Garrison Battalion, a company from the VIII Infantry Battalion, a reserve infantry company, a machine-gun platoon from the XIII Infantry Battalion and an artillery battery.[7] Air support consisted of 12 Lockheed Hudson light bombers of No. 2 Squadron, Royal Australian Air Force (RAAF).[4][8] Sparrow Force was initially deployed around Kupang, and the strategic airfield of Penfui in the south-west corner of the island, although other units were based at Klapalima, Usapa Besar and Babau, while a supply base was also established further east at Champlong.[8]
Up to this point, the government of Portugal had declined to co-operate with the Allies, relying on its claim of neutrality and plans to send an 800-strong force from Mozambique to defend the territory in the event of any Japanese invasion. However, this refusal left the Allied flank severely exposed, and a 400-man combined Dutch-Australian force subsequently occupied Portuguese Timor on 17 December. In response, the Portuguese Prime-Minister, António de Oliveira Salazar, protested to the Allied governments, while the governor of Portuguese Timor declared himself a prisoner in order to preserve the appearance of neutrality. No resistance was offered by the small Portuguese garrison; however, and the local authorities tacitly co-operated, while the population itself generally welcomed the Allied force. Most of the Dutch troops and the whole of the 2/2nd Independent Company were subsequently transferred to Portuguese Timor and distributed in small detachments around the territory.[1]
The Portuguese and the British governments reached an agreement that established the withdrawal of the Allied forces from Portuguese Timor, in exchange for the sending, by Portugal, of a military force to replace them. The Portuguese force sailed from Lourenço Marques, Mozambique, heading for Timor on 28 January 1942, but the Japanese invasion occurred before they could arrive.[9]
Prelude
In January 1942, the Allied forces on Timor became a key link in the so-called "Malay Barrier", defended by the short-lived American-British-Dutch-Australian Command under the overall command of General Sir Archibald Wavell. Additional Australian support staff arrived at Kupang on 12 February, including Brigadier William Veale, who had been made the Allied commanding officer on Timor. By this time, many members of Sparrow Force—most of whom were unused to tropical conditions—were suffering from malaria and other illnesses.[1] The airfield at Penfui in Dutch Timor also became a key air link between Australia and American forces fighting in the Philippines under General Douglas MacArthur.[3] Penfui came under attack from Japanese aircraft on 26 and 30 January 1942, however the raids were hampered by the British anti-aircraft gunners and, to a lesser degree, by P-40 fighters of the 33rd Pursuit Squadron, United States Army Air Forces, 11 of which were based in Darwin.[5] Later, another 500 Dutch troops and the British 79th Light Anti-Aircraft Battery arrived to reinforce Timor, while an additional Australian-American force was scheduled to arrive in February.[3][4]
Meanwhile, Rabaul fell to the Japanese on 23 January, followed by Ambon on 3 February, and both Gull Force and Lark Force were destroyed.[10] Later, on 16 February, an Allied convoy carrying reinforcements and supplies to Kupang—escorted by the heavy cruiser USS Houston, the destroyer USS Peary, and the sloops HMAS Swan and Warrego—came under intense Japanese air attack and was forced to return to Darwin without landing.[5] The reinforcements had included an Australian pioneer battalion—the 2/4th Pioneer Battalion—and the 49th American Artillery Battalion.[7][11] Sparrow Force could not be reinforced further and as the Japanese moved to complete their envelopment of the Netherlands East Indies, Timor was seemingly the next logical target.[3]
Battle
Japanese invasion of Portuguese Timor, 19–20 February 1942
On the night of 19/20 February 1,500 troops from the Imperial Japanese Army's 228th Regimental Group, 38th Division, XVI Army, under the command of Colonel Sadashichi Doi, began landing in Dili. Initially the Japanese ships were mistaken for vessels carrying Portuguese reinforcements, and the Allies were caught by surprise. Nevertheless, they were well-prepared, and the garrison began an orderly withdrawal, covered by the 18-strong Australian Commando No. 2 Section stationed at the airfield. According to Australian accounts the commandos killed an estimated 200 Japanese in the first hours of the battle; the Japanese army recorded its casualties as only seven men,[12] but native accounts of the landings support the Australian claims.[8]
Another group of Australian commandos, No. 7 Section, was less fortunate, driving into a Japanese roadblock by chance. Despite surrendering, according to military historian Brad Manera all but one were massacred by the Japanese.[8] Outnumbered, the surviving Australians withdrew to the south and to the east, into the mountainous interior. Van Straten and 200 Dutch East Indies troops headed southwest toward the border.[4]
Japanese landings in Dutch Timor, 19–20 February 1942
On the same night, Allied forces in Dutch Timor also came under extremely intense air attacks, which had already caused the small RAAF force to be withdrawn to Australia. The bombing was followed up by the landing of the main body of the 228th Regimental Group—two battalions totalling around 4,000 men—on the undefended southwest side of the island, at the Paha River. Five Type 94 tankettes were landed to support the Japanese infantry, and the force advanced north, cutting off the Dutch positions in the west and attacking the 2/40th Battalion positions at Penfui. A Japanese company thrust north-east to Usua, aiming to cut off the Allied retreat. In response Sparrow Force HQ was immediately moved further east, towards Champlong.[8]
Leggatt ordered the destruction of the airfield, but the Allied line of retreat towards Champlong had been cut off by the dropping of about 300 Japanese marine paratroopers, from the 3rd Yokosuka Special Naval Landing Force, near Usua, 22 km (14 mi) east of Kupang.[3][8] Sparrow Force HQ moved further eastward, and Leggatt's men launched a sustained and devastating assault on the paratroopers, culminating in a bayonet charge. By the morning of 23 February, the 2/40th Battalion had killed all but 78 of the paratroopers, but had been engaged from the rear by the main Japanese force once again. With his soldiers running low on ammunition, exhausted, and carrying many men with serious wounds, Leggatt accepted a Japanese invitation to surrender at Usua. The 2/40th Battalion had suffered 84 killed and 132 wounded in the fighting, while more than twice that number would die as prisoners of war during the next two-and-a-half years.[8] Veale and the Sparrow Force HQ force—including about 290 Australian and Dutch troops—continued eastward across the border, to link up with the 2/2 Independent Company.[7]
Australian commandos continue to resist, February – August 1942

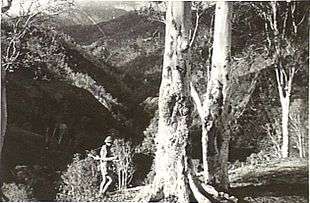
By the end of February, the Japanese controlled most of Dutch Timor and the area around Dili in the northeast. However, the Australians remained in the south and east of the island. The 2/2nd Independent Company was specially trained for commando-style, stay behind operations and it had its own engineers and signallers, although it lacked heavy weapons and vehicles.[3] The commandos were hidden throughout the mountains of Portuguese Timor, and they commenced raids against the Japanese, assisted by Timorese guides, native carriers and mountain ponies.[3] Although Portuguese officials—under Governor Manuel de Abreu Ferreira de Carvalho—remained officially neutral and in charge of civil affairs, both the Portuguese and the indigenous East Timorese were usually sympathetic to the Allies, who were able to use the local telephone system to communicate among themselves and to gather intelligence on Japanese movements. However, the Allies initially did not have functioning radio equipment and were unable to contact Australia to inform them of their continued resistance.[13]
Doi sent the Australian honorary consul, David Ross, also the local Qantas agent, to find the commandos and pass on a demand to surrender. Spence responded: "Surrender? Surrender be fucked!" Ross gave the commandos information on the disposition of Japanese forces and also provided a note in Portuguese, stating that anyone supplying them would be later reimbursed by the Australian government.[14] In early March, Veale and Van Straten's forces linked up with the 2/2nd Company. A replacement radio—nicknamed "Winnie the War Winner"—was cobbled together and contact was made with Darwin.[4] By May, Australian aircraft were dropping supplies to the commandos and their allies.[15]
The Japanese high command sent a highly regarded veteran of the Malayan campaign and the Battle of Singapore, a major known as the "Tiger of Singapore" (or "Singapore Tiger"; his real name is unknown), to Timor. On 22 May, the "Tiger"—mounted on a white horse—led a Japanese force towards Remexio. An Australian patrol, with Portuguese and Timorese assistance, staged an ambush and killed four or five of the Japanese soldiers. During a second ambush, an Australian sniper shot and killed the "Tiger". Another 24 Japanese soldiers were also killed, and the force retreated to Dili.[15] On 24 May, Veale and Van Straten were evacuated from the south east coast by an RAAF Catalina and Spence was appointed commanding officer, after being promoted to Lieutenant Colonel. On 27 May, Royal Australian Navy (RAN) launches successfully completed the first supply and evacuation missions to Timor.[15]
.jpg)
In June, General Douglas MacArthur—now the Supreme Allied Commander in the South West Pacific Area—was advised by General Thomas Blamey—Allied land force commander—that a full-scale Allied offensive in Timor would require a major amphibious assault, including at least one infantry division (at least 10,000 personnel). Because of this requirement and the overall Allied strategy of recapturing areas to the east, in New Guinea and the Solomon Islands, Blamey recommended that the campaign in Timor should be sustained for as long as possible, but not expanded. This suggestion was ultimately adopted.[15]
Relations between Ferreira de Carvalho and the Japanese deteriorated. His telegraph link with the Portuguese Government in Lisbon was cut. In June 1942, a Japanese official complained that the Governor had rejected Japanese demands to punish Portuguese officials and Timorese and civilians who had assisted the "invading army" (the Australians). On 24 June, the Japanese formally complained to Lisbon, but did not take any action against Ferreira de Carvalho.[16] Meanwhile, Doi once again sent Ross with a message, complimenting Sparrow Force on its campaign so far, and again asking that it surrender. The Japanese commander drew a parallel with the efforts of Afrikaner commandos of the Second Boer War and said that he realized it would take a force 10 times that of the Allies to win. Nevertheless, Doi said he was receiving reinforcements, and would eventually assemble the necessary units. This time Ross did not return to Dili, and he was evacuated to Australia on 16 July.[15]
Japanese counter-offensive, August 1942
In August, the Japanese 48th Division—commanded by Lieutenant General Yuitsu Tsuchihashi—began arriving from the Philippines and garrisoned Kupang, Dili and Malacca, relieving the Ito detachment.[17] Tsuchihashi then launched a major counter-offensive in an attempt to push the Australians into a corner on the south coast of the island.[18] Strong Japanese columns moved south—two from Dili and one from Manatuto on the northeast coast. Another moved eastward from Dutch Timor to attack Dutch positions in the central south of the island. The offensive ended on 19 August when the main Japanese force was withdrawn to Rabaul, but not before they secured the central town of Maubisse and the southern port of Beco. The Japanese were also recruiting significant numbers of Timorese civilians, who provided intelligence on Allied movements.[15][19] Meanwhile, also in late-August, a parallel conflict began when the Maubisse rebelled against the Portuguese.[20]
During September the main body of the Japanese 48th Division began arriving to take over the campaign. The Australians also sent reinforcements, in the form of the 450-strong 2/4th Independent Company—known as "Lancer Force"—which arrived on 23 September. The destroyer HMAS Voyager ran aground at the southern port of Betano while landing the 2/4th, and had to be abandoned after it came under air attack. The ship's crew was safely evacuated by HMAS Kalgoorlie and Warrnambool on 25 September 1942 and the ship destroyed by demolition charges.[21] On 27 September, the Japanese mounted a thrust from Dili towards the wreck of Voyager, but without any significant success.[15]
By October, the Japanese had succeeded in recruiting significant numbers of Timorese civilians, who suffered severe casualties when used in frontal assaults against the Allies. The Portuguese were also being pressured to assist the Japanese, and at least 26 Portuguese civilians were killed in the first six months of the occupation, including local officials and a Catholic priest. On 1 November, the Allied high command approved the issuing of weapons to Portuguese officials, a policy which had previously been carried out on an informal basis. At around the same time, the Japanese ordered all Portuguese civilians to move to a "neutral zone" by 15 November. Those who failed to comply were to be considered accomplices of the Allies. This succeeded only in encouraging the Portuguese to cooperate with the Allies, whom they lobbied to evacuate some 300 women and children.[15]
.jpg)
Spence was evacuated to Australia on 11 November, and the 2/2nd commander, Major Bernard Callinan was appointed Allied commander in Timor. On the night of 30 November / 1 December, the Royal Australian Navy mounted a major operation to land fresh Dutch troops at Betano, while evacuating 190 Dutch soldiers and 150 Portuguese civilians. The launch HMAS Kuru was used to ferry the passengers between the shore and two corvettes, HMAS Armidale and Castlemaine. However, Armidale—carrying the Dutch reinforcements—was sunk by Japanese aircraft and almost all of those on board were lost.[15] Also during November, the Australian Army's public relations branch arranged to send the Academy Award-winning documentary filmmaker Damien Parer, and a war correspondent named Bill Marien, to Timor. Parer's film, Men of Timor, was later greeted with enthusiasm by audiences in Allied countries.[22]
Australian withdrawal, December 1942 – February 1943
By the end of 1942, the chances of the Allies re-taking Timor were remote, as there were now 12,000 Japanese troops on the island and the commandos were coming into increasing contact with the enemy. The Australian chiefs of staff estimated that it would take at least three Allied divisions, with strong air and naval support to recapture the island.[15] Indeed, as the Japanese efforts to wear down the Australians and to separate them from their native support became more effective, the commandos had found their operations becoming increasingly untenable. Likewise, with the Australian Army fighting a number of costly battles against the Japanese beachheads around Buna in New Guinea, there were currently insufficient resources to continue operations in Timor. As such, from early December Australian operations on Timor would be progressively wound down.[19]
On 11–12 December, the remainder of the original Sparrow Force—except for a few officers—was evacuated with Portuguese civilians, by the Dutch destroyer HNLMS Tjerk Hiddes.[23] Meanwhile, in the first week of January the decision was made to withdraw Lancer Force. On the night of 9/10 January 1943, the bulk of the 2/4th and 50 Portuguese were evacuated by the destroyer HMAS Arunta. A small intelligence team known as S Force was left behind, but its presence was soon detected by the Japanese. Aided by folboats (collapsible kayaks, or folding boats), wth the remnants of Lancer Force, S Force made its way to the eastern tip of Timor, where the Australian-British Z Special Unit was also operating. They were evacuated by the American submarine USS Gudgeon on 10 February.[15][24] Forty Australian commandos were killed during this phase of the fighting, while 1,500 Japanese were believed to have died.[13]
Aftermath
Overall, while the campaign on Timor had little strategic value, the Australian commandos had prevented an entire Japanese division from being used in the earlier phases of the New Guinea campaign[15] while at the same time inflicting a disproportionate level of casualties on them. In contrast to those in Java, Ambon or Rabaul, Australian operations in Timor had been far more successful, even if it was also largely a token effort in the face of overwhelming Japanese strength. Likewise, they had proved that in favourable circumstances, unconventional operations could be both versatile and more economic than conventional operations, for which the resources were not available to the Allies at that time.[25] Most civilian deaths were caused by Japanese reprisals against the civilian population. The civilian death toll is estimated at 40,000 to 70,000.[1][26]
Ultimately, Japanese forces remained in control of Timor until their surrender in September 1945,[1] following the destruction of Hiroshima and Nagasaki and the Soviet invasion of Manchuria. On 5 September 1945, the Japanese commanding officer met Portuguese Governor Manuel de Abreu Ferreira de Carvalho, effectively returning power to him and placing the Japanese forces under Portuguese authority. On 11 September, the Australian Timorforce arrived in Kupang harbour and accepted the surrender of all Japanese forces on Timor from the senior Japanese officer on Timor, Colonel Kaida Tatsuichi of the 4th Tank Regiment. The commander of the Timorforce, Brigadier Lewis Dyke, a senior diplomat, W. D. Forsyth, and "as many ships as possible" were dispatched to Dili, arriving on 23 September. Ceremonies were then held with Australians, Portuguese and other local residents. Australian troops then supervised the disposal of arms by Japanese work parties before returning to West Timor for the surrender of the commander of the 48th Division, Lieutenant General Yamada Kunitaro.[27] On 27 September, a Portuguese naval and military force of more than 2,000 troops arrived to an impressive ceremony of welcome by the Timorese people. These troops included three engineering companies along with substantial supplies of food and construction materials for the reconstruction of Timor.[28]
See also
Notes
- 1 2 3 4 5 6 7 "A Short History of East Timor". Department of Defence. 2002. Archived from the original on 3 January 2006. Retrieved 3 January 2007.
- 1 2 Dennis 2008, p. 528.
- 1 2 3 4 5 6 7 Dennis 2008, p. 529.
- 1 2 3 4 5 6 "Fighting in Timor, 1942". Australian War Memorial. Retrieved 15 August 2014.
- 1 2 3 4 "Fall of Timor". Australian Department of Veteran Affairs. 2005. Archived from the original on 27 July 2008. Retrieved 18 August 2008.
- ↑ Henning 1995, p. 47.
- 1 2 3 Klemen, L. and Graham Donaldson. "The Japanese Invasion of Dutch West Timor Island, February 1942". Forgotten Campaign: The Dutch East Indies Campaign 1941–1942. Retrieved 31 January 2016.
- 1 2 3 4 5 6 7 Manera, Brad. "Remembering 1942: The Battles on Timor". Australian War Memorial. Retrieved 15 August 2014.
- ↑ Wigmore 1957, p. 475.
- ↑ Dennis 2008, p. 25 and 529.
- ↑ "2/4th Pioneer Battalion". The Australian War Memorial. Retrieved 5 January 2010.
- ↑ 防衛研修所戦史室, 戦史叢書 蘭印攻略作戦, Tokyo:Asagumo-Shimbun, 1967. (Japanese official military history by National Institute for Defense Studies)
- 1 2 Callinan 1953, p. xxviii.
- ↑ "David Ross". The Airways Museum & Civil Aviation Historical Society. Archived from the original on 11 February 2010. Retrieved 5 January 2010.
- 1 2 3 4 5 6 7 8 9 10 11 12 Klemen, L (2000). "The fighting on the Portuguese East Timor Island, 1942". Retrieved 18 August 2008.
- ↑ Geoffrey Gunn, 1999, History of Timor (Centro de Estudos sobre África e do Desenvolvimento; Universidade Técnica de Lisboa), p.13
- ↑ Rottmann 2002, p. 211.
- ↑ White 2002, p. 92.
- 1 2 Dennis 2008, p. 530.
- ↑ "History of Timor" (PDF). Retrieved 5 January 2010.
- ↑ "HMAS Voyager (I)". Royal Australian Navy. Retrieved 23 August 2008.
- ↑ "Damien Peter Parer". The Australian War Memorial. Retrieved 5 January 2010.
- ↑ Wheeler 2004, p. 152.
- ↑ Hoehn 2011, p. 69.
- ↑ Dennis 2008, pp. 529–530.
- ↑ Durand, Frederic (14 October 2011). "Three centuries of violence and struggle in East Timor (1726–2008)". Online Encyclopedia of Mass Violence. ISSN 1961-9898. Retrieved 31 January 2016.
- ↑ For details about these and other postwar events, see Horton 2009.
- ↑ Geoffrey Gunn, 1999, History of Timor (Centro de Estudos sobre África e do Desenvolvimento; Universidade Técnica de Lisboa), p.129
References
- Callinan, Bernard (1953). Independent Company: The Australian Army in Portuguese Timor 1941–43. London: William Heinemann. ISBN 0-85859-339-4.
- Campbell, Archie (1994). The Double Reds of Timor. Swanbourne: John Burridge Military Antiques. ISBN 0-646-25825-7.
- Dennis, Peter; et al. (2008). The Oxford Companion to Australian Military History (Second ed.). Melbourne: Oxford University Press Australia & New Zealand. ISBN 978-0-19-551784-2.
- Doig, Colin (1986). A History of the 2nd Independent Company and 2/2 Commando Squadron. Perth: Selbstverlag. ISBN 0-7316-0668-X.
- Henning, Peter (1995). Doomed Battalion: The Australian 2/40th Battalion 1940–45. Mateship & Leadership in War & Captivity. St Leonards: Allen and Unwin. ISBN 1-86373-763-4.
- Hoehn, John (2011). Commando Kayak: The Role of the Folboat in the Pacific War. Zurich: Hirsch Books. ISBN 978-3-033-01717-7.
- Horton, William Bradley (2009). "Through the Eyes of Australians: The Timor Area in the Early Postwar Period" Ajitaiheiyotokyu 12: 251–277.
- Rottman, George (2002). World War II Pacific Island Guide: A Geo-Military Study. Westport: Greenwood Press. ISBN 0-313-31395-4.
- Wheeler, Tony (2004). East Timor. Lonely Planet Publications. ISBN 1-74059-644-7.
- White, Ken (2002). Criado: A Story of East Timor. Briar Hill: Indra Publishing. ISBN 0-9578735-4-9.
- Wigmore, Lionel (1957). The Japanese Thrust. Australia in the War of 1939–1945. Series 1 – Army, Volume IV (1st ed.). Canberra, Australian Capital Territory: Australian War Memorial. OCLC 3134219.
- Wray, Christopher (1987). Timor 1942: Australian Commandos at War with the Japanese. Hawthorn: Hutchinson Australia. ISBN 0-09-157480-3.
External links
- Australian Department of Veterans Affairs, 2005, "Fall of Timor"
- The Japan Times, 28 April 2007, East Timor former sex slaves start speaking out
Coordinates: 10°23′S 123°38′E / 10.383°S 123.633°E